SupportOrder Management
Tagging Orders
Applying Tags to Orders
How to Add Tags to Orders in the Handled System
Tags allow you to categorize or flag orders within the Handled system. This includes tagging orders for Rush Shipment or any other workflow your account uses. This guide explains how to locate an order and apply the appropriate tag.
1. Navigate to the Order List Page
Go to:
🔗 https://my.handledcommerce.com/en/wms/shipment-order/list
This page displays all orders currently in your Handled workspace.
2. Locate the Order
Use the built-in Search or Filter options to find the order you want to update.
You can search by:
- Order number
- Customer name
- Status
- Date range
- SKU (depending on configuration)
3. Select the Order
Click the order in the grid to select it.
4. Click the Tag Button
In the upper-right of the action bar, click the Tag icon/button.
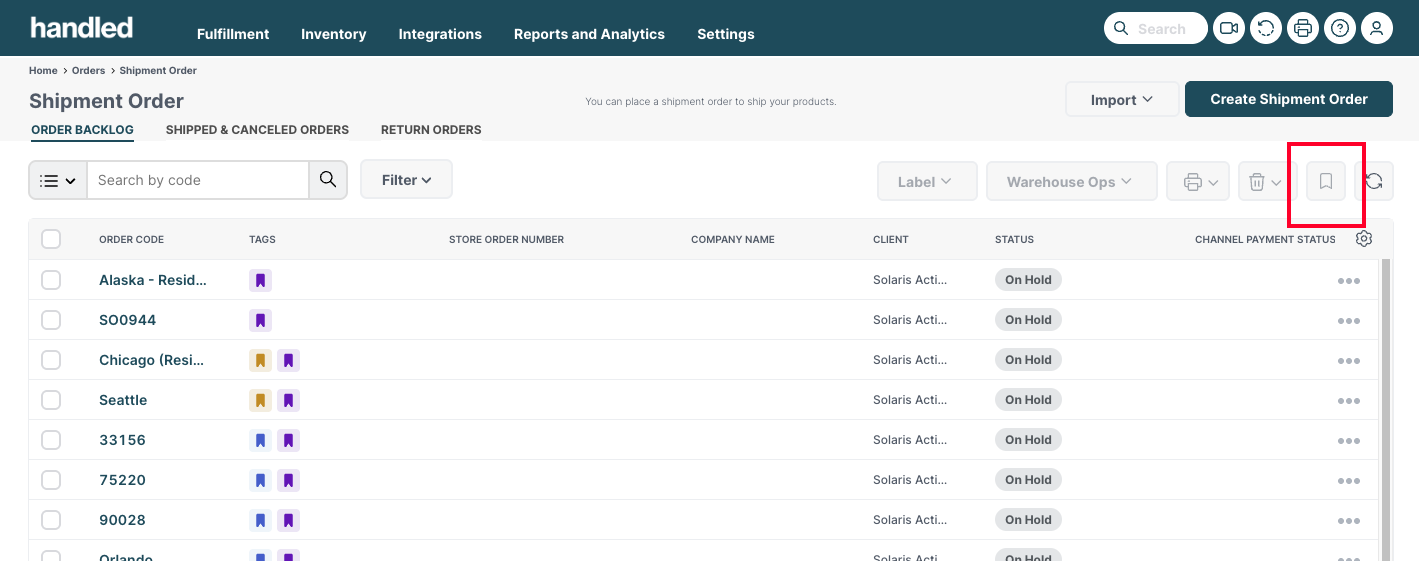
This opens the tag management window for the selected order.
5. Add the Tag You Need
In the tag window:
- Search for an existing tag, or
- Select the tag from the list.
Click Apply to save your changes.
The tag will immediately appear on the order and will be visible to the Handled operations team.
Need Help Choosing the Right Tag?
If you're unsure which tags to use for specific workflows—including Rush Shipment, special handling, or account-specific labels—please contact your Account Manager or our support team at support@handledcommerce.com